Scaleway搭配Cloudflared Tunnel

type
Post
status
Published
date
Mar 2, 2023
slug
scaleway
summary
Scaleway(ipv6)机器使用cf tunnel来加速代理
tags
开发
折腾
分享
category
技术分享
icon
password
Scaleway stardust ipv6only
Scaleway(星尘)ipv6的小机器以便宜著称,之前一月下来一共0.38欧元,现在虽然涨价到了0.42欧,但是还是值得拿来玩玩。
搭建了个测速,有需求的朋友可以来跑一下:http://sc.zzzz.li:6688/
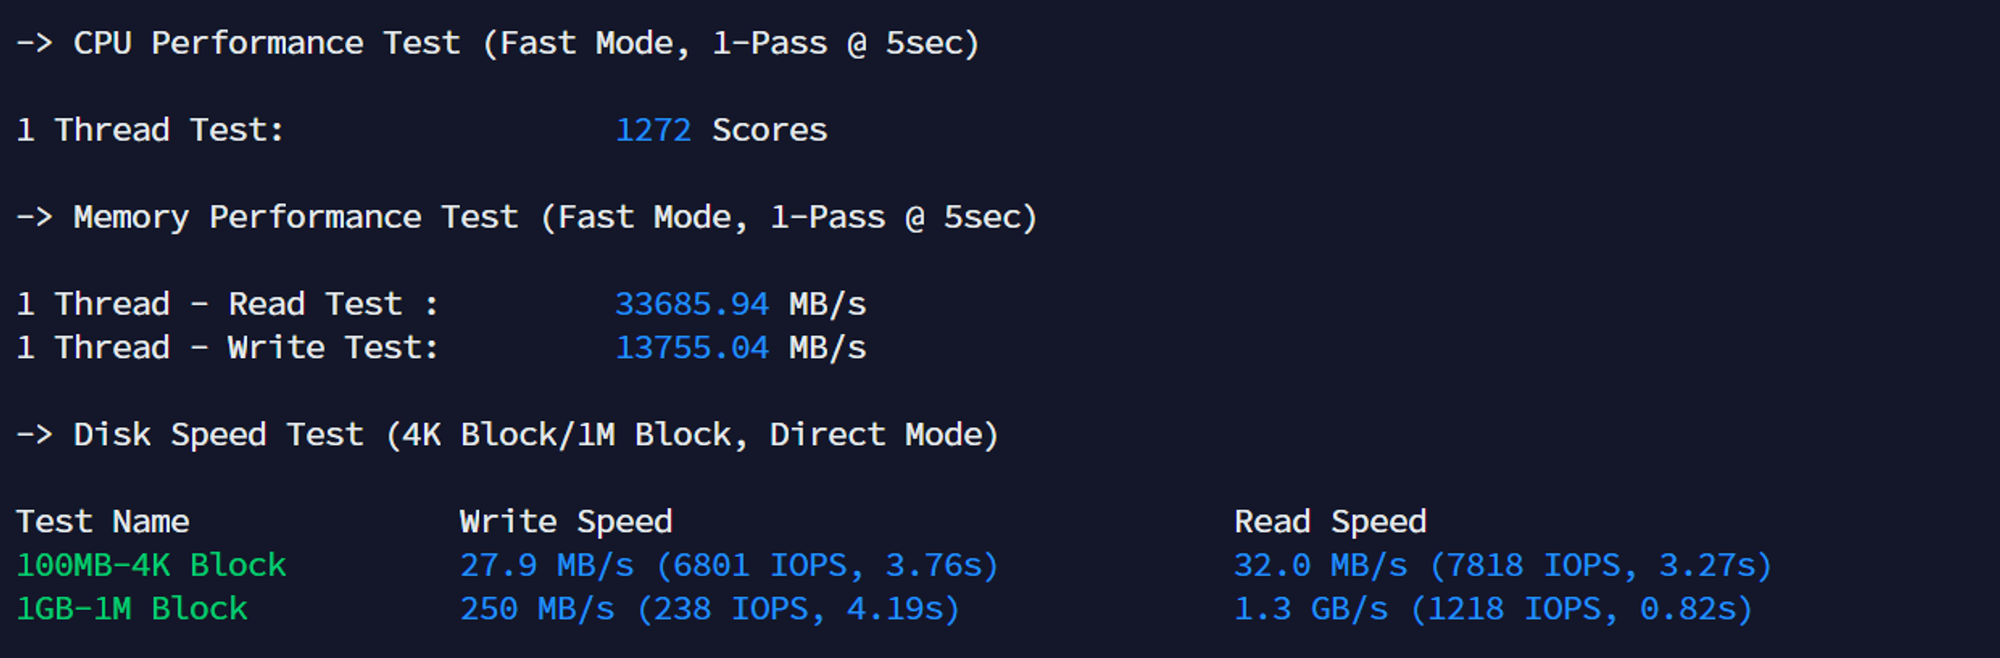
机器虽然小,但是配置很强悍
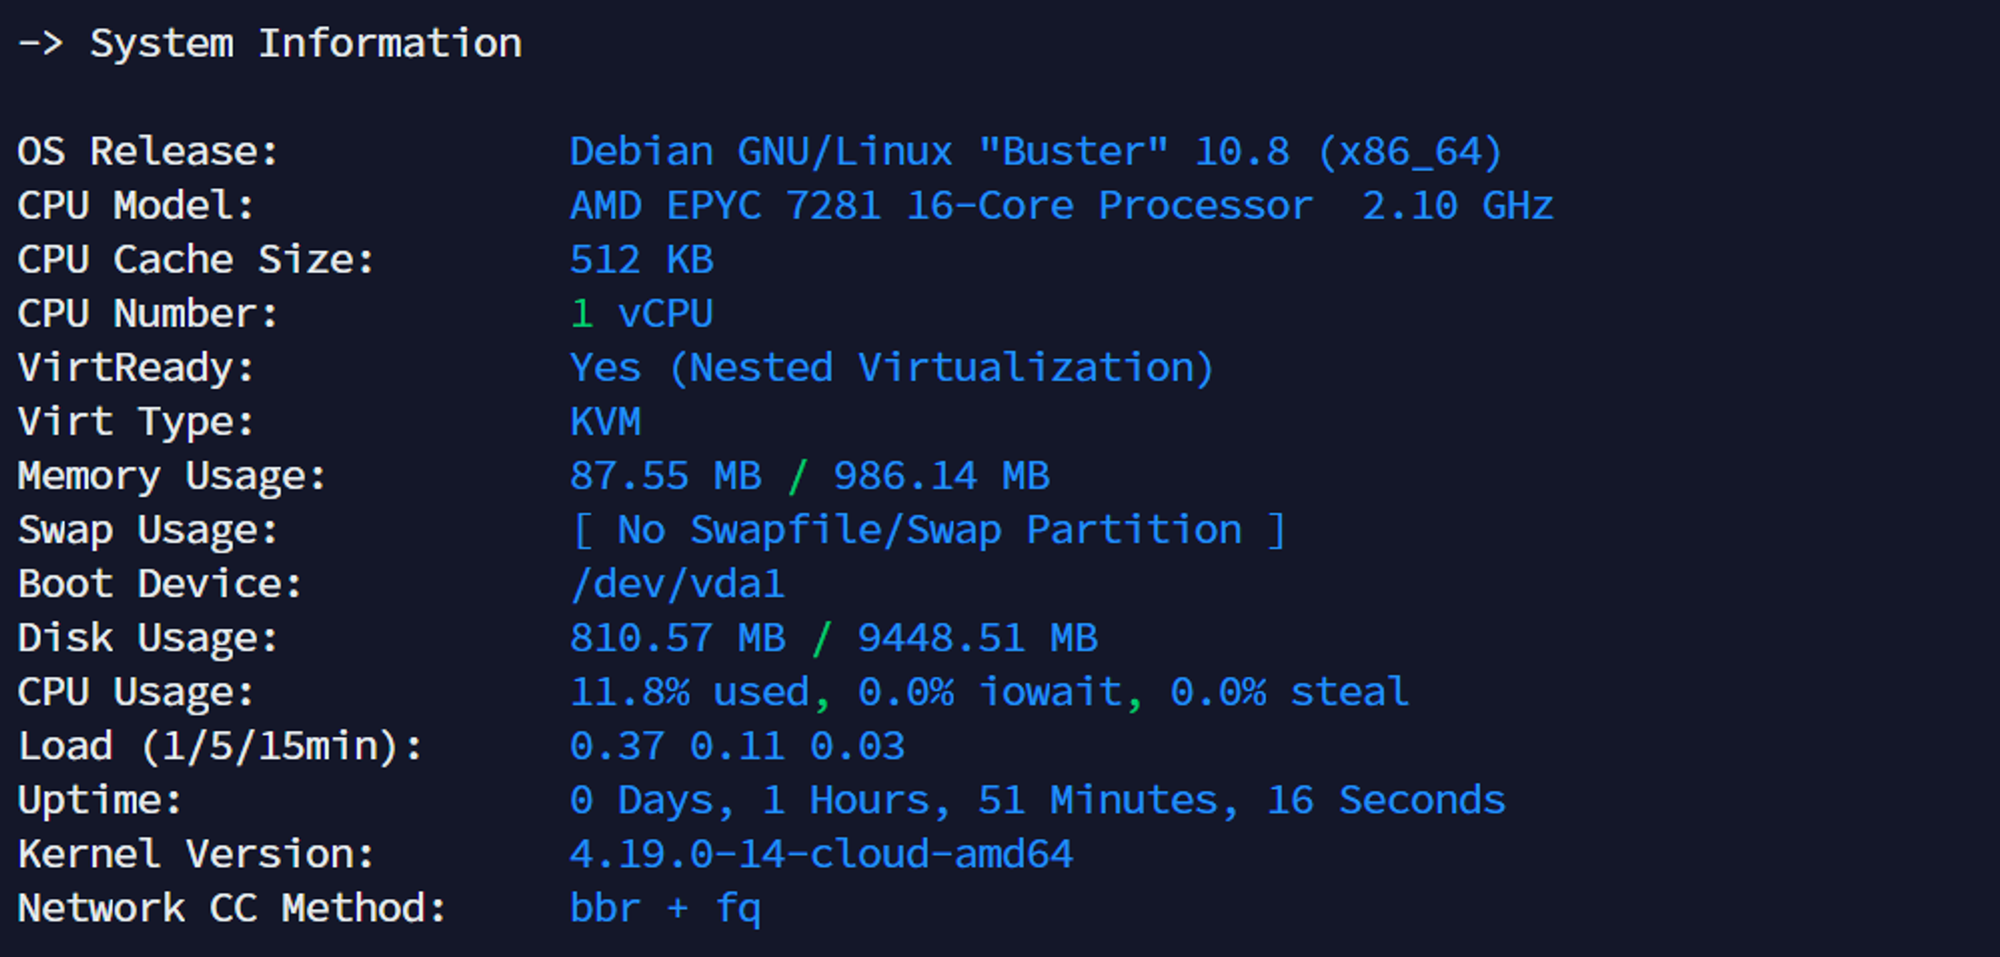
图片来自网络
上图可以看到,作为每个月3块钱左右的机器,
Scaleway的配置甚至超过了很多大厂的机器性能。目前官网直接开是开不出开的,要用Scaleway cli,具体教程就不写了,网上很多,安装好cli之后先认证,然后直接调用命令来创建机器:
建议直接创建
debian,问题会少很多,下面的image字段修改为 image=debian_bullseye 创建命令:
scw instance server create type=STARDUST1-S zone=fr-par-1 image=ubuntu_jammy root-volume=l:10G name=scw-1 ip=none project-id=xxx(在的面板有)提醒,在创建之前务必添加好ssh-key
创建之后不一定就能开机,因为资源缺,所以碰运气,我一般都是开了2天左右开好,网上有开机脚本,实测用处不大,疑问scw cli返回的状态不准确。
DD为Debian
这里需要注意的就是
IP一定要写对了,不然只能删鸡重开了--ip-addr 240e::ffff::1/64 --ip-gate 240e::ffff::这2个地址在你的面板可以看到,ip-addr后面的
/64必须要加上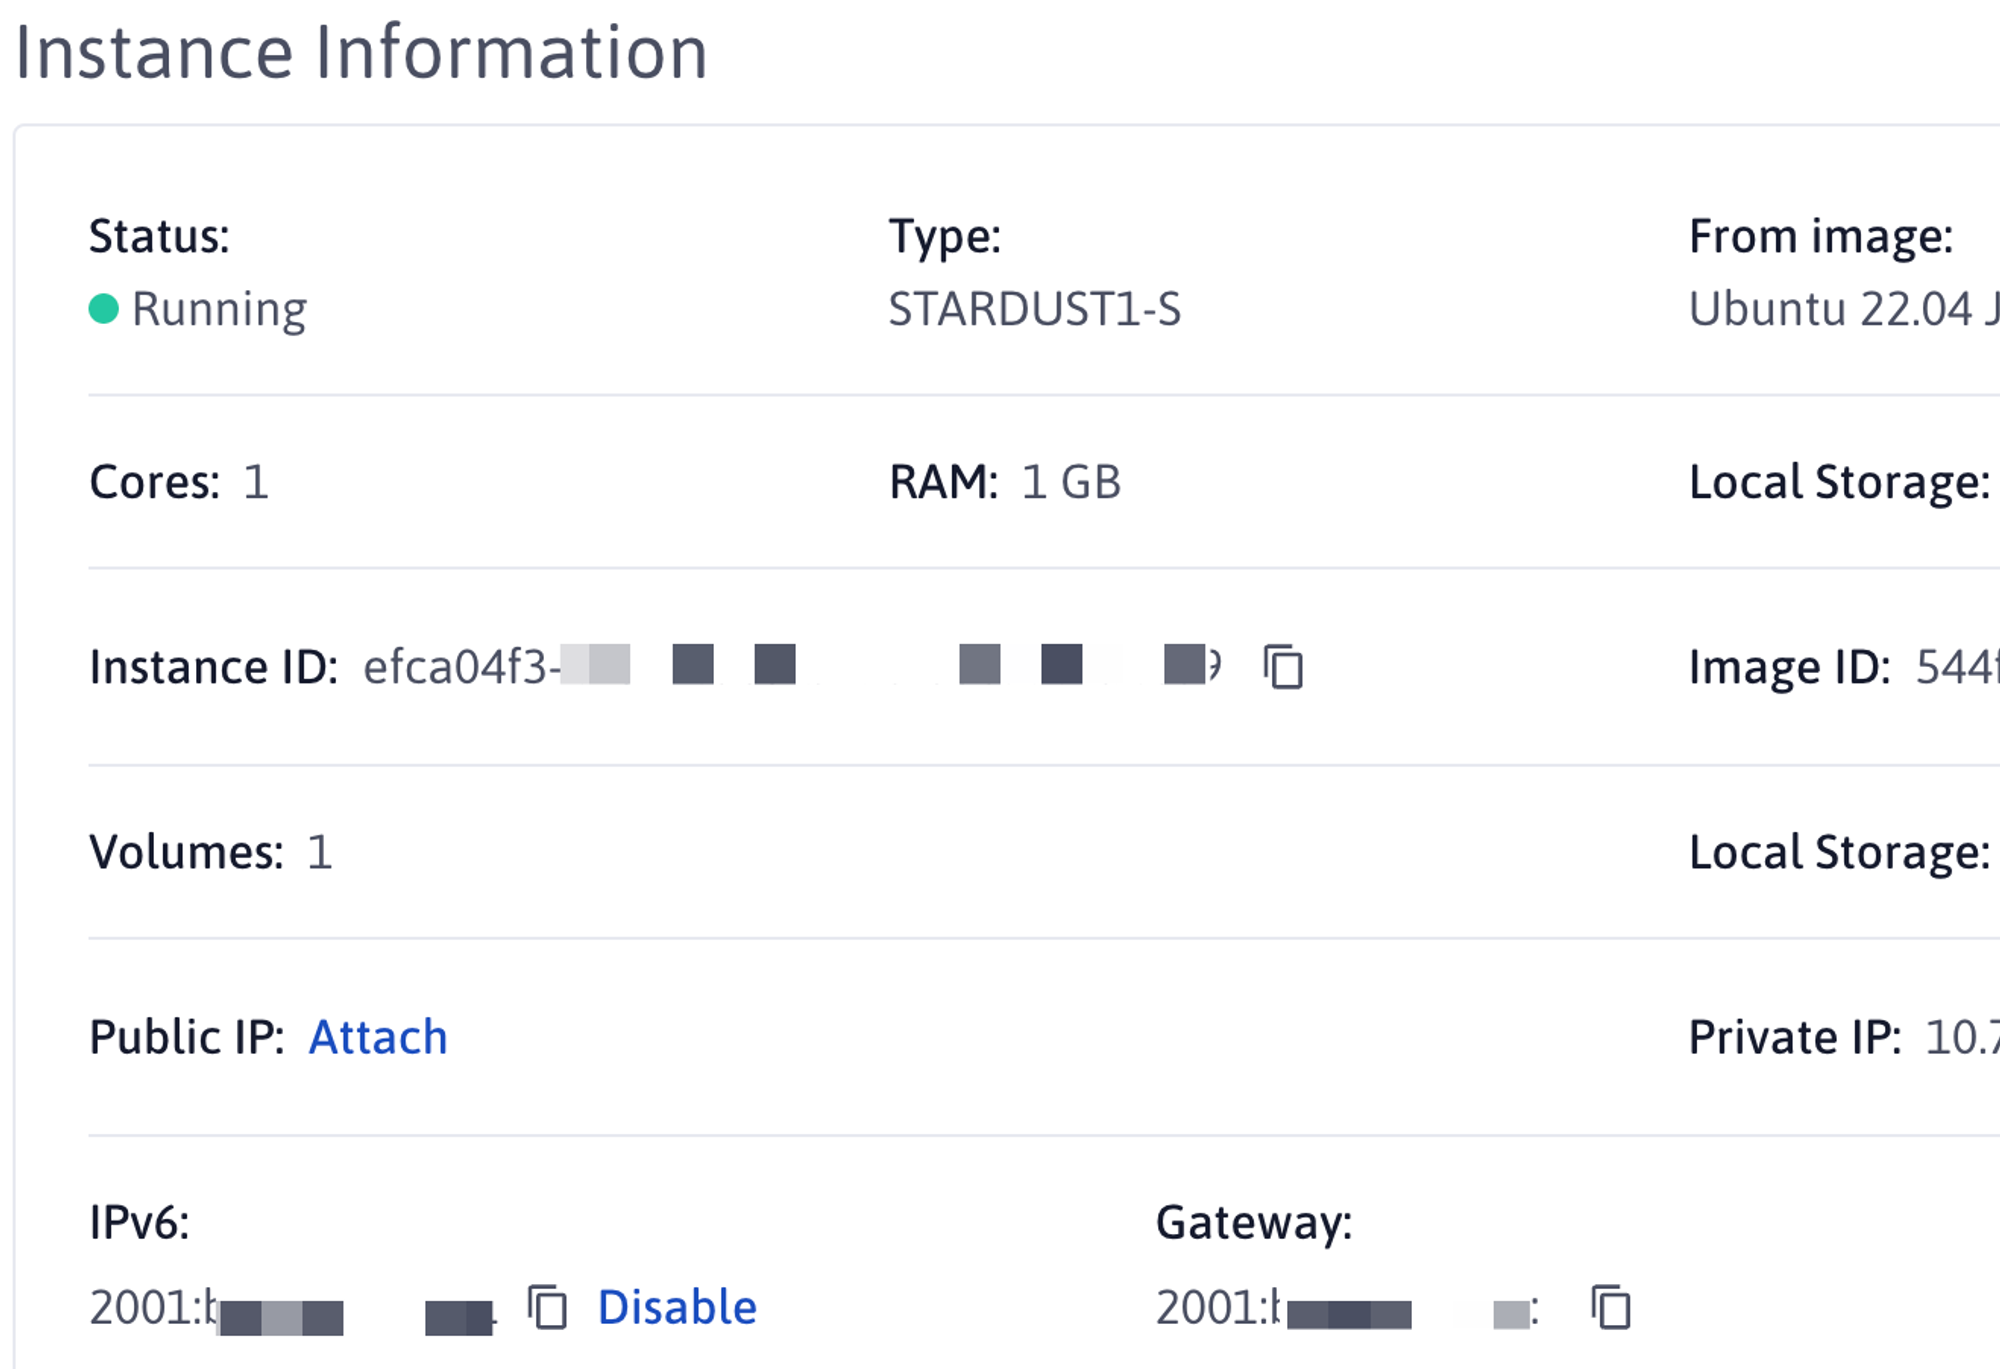
bash <(wget --no-check-certificate -qO- 'https://raw.githubusercontent.com/MoeClub/Note/master/InstallNET.sh') -a -d 10 -v 64 -p "sc654312" -port "22" --ip-addr 2001:bc8:63/64 --ip-gate 2001:bc8:: --ip-mask 255.255.255.254 --ip-dns 2001:4860:4860::8888
使用WARP访问
在我们执行安装脚本之前需要先修改
dns64以支持访问ipv4的资源,不然脚本没办法请求成功编辑:
vim /etc/resolv.conf修改为:(公共dns64服务)
nameserver 2a00:1098:2b::1
nameserver 2a00:1098:2c::1下面开始安装warp
# 安装wireguard
apt update -y && apt install wireguard sudo curl vim openresolv -y

# 安装wgcf
curl -fsSL git.io/wgcf.sh | sudo bash

# 注册账户
wgcf register

# 生成配置文件
wgcf generate

# 编辑配置文件
vim wgcf-profile.conf

# 将配置文件的DNS、AllowedIPs、Endpoint,如下
[Interface]
PrivateKey = 这里会自动生成
Address = 172.16.0.2/32
Address = 这里会自动生成
DNS = 8.8.8.8,8.8.4.4,2001:4860:4860::8888,2001:4860:4860::8844
MTU = 1280
[Peer]
PublicKey = bmXOC+F1FxEMF9dyiK2H5/1SUtzH0JuVo51h2wPfgyo=
AllowedIPs = 0.0.0.0/0
Endpoint = [2606:4700:d0::a29f:c001]:2408

# 复制配置文件到wireguard文件夹
cp wgcf-profile.conf /etc/wireguard/wgcf.conf

# 尝试启动 wireguard
wg-quick up wgcf

# 测试
ping google.com -4

# 关闭wgcf接口
wg-quick down wgcf

# 加入开机启动(这个暂时不要执行,看下面的)
systemctl start wg-quick@wgcf
systemctl enable wg-quick@wgcf

# 默认v6优先级
# 编辑文件 /etc/gai.conf,将 label 2002::/16 2 的注释删除
!!!另外请注意,我安装了wireguard之后出现了开机ssh不启动的问题…原因未知,解决方法
crontab -e #加入下面这行
@reboot systemctl start wg-quick@wgcf
等系统启动了之后在开启
wg-quick@wgcf 这里我被坑了1个小时才解决接下来我们看一下
speedtest的测速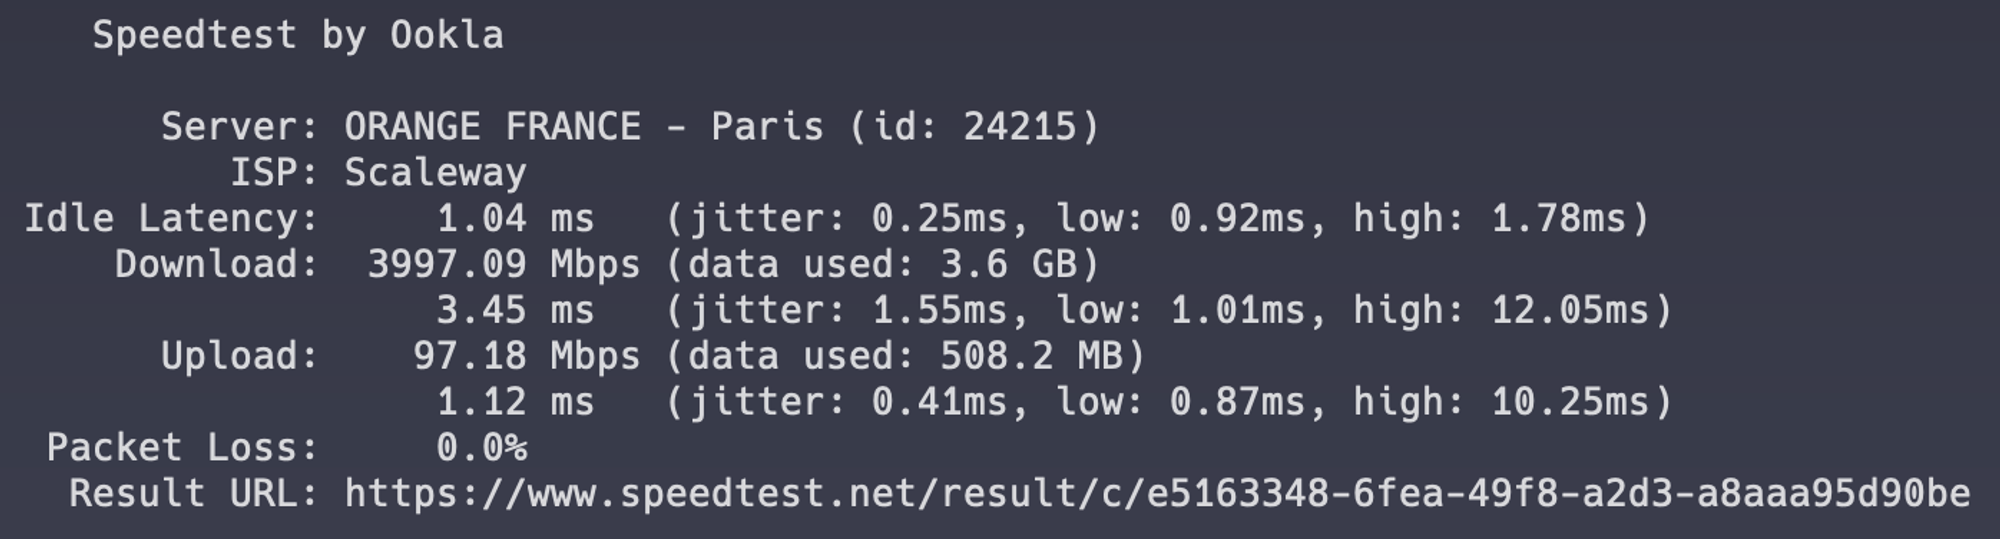
要比控制台标注的100 Mbps快不少
出现的问题
开机ssh不启动
这个机器的
systemctl命令经常会卡住或者很慢,我自己也碰到过开机了ssh无法正常使用,暂时的解决办法:crontab -e@reboot /etc/init.d/ssh start之后没有出现过问题,暂时这样。
安装v2ray
按照这个教程来安装即可
安装完成之后:
vim /usr/local/etc/v2ray/config.json配置文件:
{
  "inbounds": [
    {
      "port": 16888,
      "protocol": "vmess",
      "settings": {
        "clients": [
          {
            "id": "自己生成一个"
          }
        ]
      },
      "streamSettings": {
        "network": "ws",
        "wsSettings": {
        "path": "/api"
        }
      }
    }
  ],
  "outbounds": [
    {
      "protocol": "freedom",
      "settings": {}
    }
  ]
}
最后执行:
service v2ray start 检查状态没问题的话就可以正常连接了安装Cloudflared Tunnel
首先你得有cloudflared的账号,然后在上面绑定了一个域名
我是Ubuntu 22.04 LTS (Jammy Jellyfish)
# Add cloudflare gpg key
sudo mkdir -p --mode=0755 /usr/share/keyrings
curl -fsSL https://pkg.cloudflare.com/cloudflare-main.gpg | sudo tee /usr/share/keyrings/cloudflare-main.gpg >/dev/null

# Add this repo to your apt repositories
echo 'deb [signed-by=/usr/share/keyrings/cloudflare-main.gpg] https://pkg.cloudflare.com/cloudflared jammy main' | sudo tee /etc/apt/sources.list.d/cloudflared.list

# install cloudflared
sudo apt-get update && sudo apt-get install cloudflared
其他系统打开这个链接来查看https://pkg.cloudflare.com/index.html
# login会给一个网页链接,复制到浏览器打开进行授权
cloudflared tunnel login
# 创建隧道
cloudflared tunnel create scaleway
# 查看隧道
cloudflared tunnel list
# 设置cname记录到你指定的域名
cloudflared tunnel route dns scaleway swcf.xxxx.net
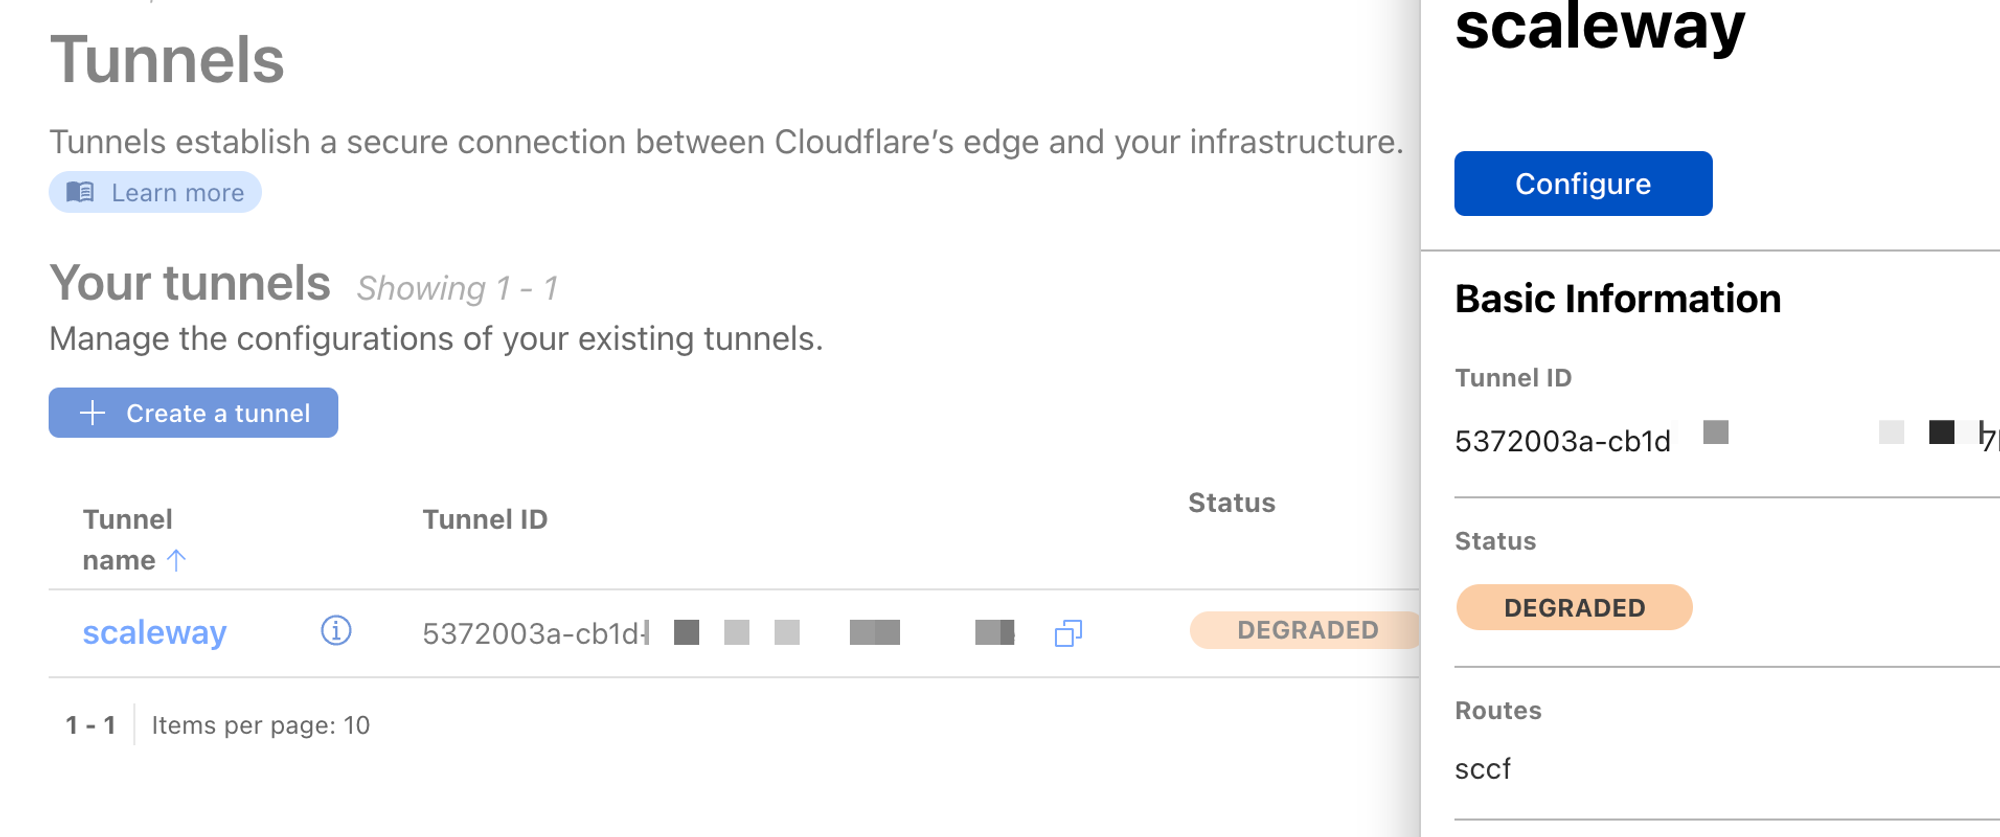
创建完成之后我们在cloudflare后台可以看到
配置Cloudflared Tunnels
vim ~/.cloudflared/config.yml填入
tunnel: xxxxxxxx-xxxx-xxxx-xxxx-xxxxxxxxxxxx
credentials-file: /root/.cloudflared/xxxxxxxx-xxxx-xxxx-xxxx-xxxxxxxxxxxx.json
ingress:
  - hostname: swcf.xxxxx.net
    service: http://localhost:16888
  - service: http_status:404
tunnel:上一步创建的隧道idcredentials-file 上一步创建的时候会有这个路径,直接复制过来配置好之后运行:
cloudflared tunnel --edge-ip-version=6 run scaleway我们v2ray的配置需要修改为
host:swcf.xxxxx.netport:443tls:打开其他不用改变
最后创建系统服务,搞定开启自动启动
cloudflared service install
systemctl start cloudflared
systemctl status cloudflared
整个教程结束